
News

Lisle 37000 Disconnect Set: When A/C or Fuel Lines Need the Right Release Tool

A quick-connect line is only quick when the correct release tool is in the gap. On air conditioning and fuel-line service, prying, twisting, or pulling harder can turn a service step into a damaged fitting, bent retainer, or leaking connection.

Lisle 37000 Air Conditioning / Fuel Line Disconnect Tool Set is a small six-piece set for buyers who need the right size release tool before separating selected A/C and fuel-line couplings. It is not a universal vehicle fitment promise, so the useful question is whether your fitting style and size match what Lisle documents.

What Parts Universe lists

Parts Universe currently lists this item as Lisle 37000 Air Conditioning/Fuel Line Disconnect Tool Set. The active Shopify product record verified for this article shows:

  • Parts Universe SKU: LSL-37000
  • Manufacturer part number: 37000
  • UPC: 083045370000
  • Current Parts Universe price: $7.71
  • Current inventory: 1 unit
  • Current status: active and available for sale

What Lisle verifies

Lisle's official product page identifies the tool as 37000 Air Conditioning / Fuel Line Disconnect Tool Set, with SKU 37000, UPC 083045370000, and shipping weight 0.25 lb.

Lisle describes the set as a way to disconnect spring-lock couplings on Ford and Chrysler air conditioning lines. The same official page also says it works on fuel-line quick-connect couplings found on GM, Ford, and Chrysler vehicles, and that the 5/16 inch size fits push-lock connectors found on Ford radiators and transmission lines.

The six included sizes

Lisle documents six disconnect-tool sizes in the 37000 set:

  • 5/16 inch
  • 3/8 inch
  • 1/2 inch
  • 5/8 inch
  • 3/4 inch
  • 7/8 inch

The set is useful when you do not know the line size until the vehicle is in front of you, or when a shop wants common A/C and fuel-line release sizes in one holder.

When this set makes sense

Choose a set like Lisle 37000 when the repair involves a documented spring-lock or quick-connect fitting and you can match the line to one of the listed sizes. It is especially practical for older service work where an A/C line, fuel-line coupling, radiator push-lock connector, or transmission-line connector needs the release fingers compressed evenly.

It is not the right answer for every plastic fuel connector, every late-model specialty retainer, or a fitting that is rusted, cracked, or already deformed. In those cases, identify the connector style first and follow the vehicle service information.

Checks before buying

  1. Identify the fitting style. Confirm that the job uses a spring-lock or quick-connect design that calls for a collar-style disconnect tool.
  2. Measure or confirm the line size. Lisle lists 5/16, 3/8, 1/2, 5/8, 3/4, and 7/8 inch tools in this set.
  3. Check access. Lisle notes confined-space use, but the tool still needs enough room to sit squarely against the connector.
  4. Plan for fluid or refrigerant safety. Do not open a pressurized A/C or fuel system without the proper recovery, depressurizing, and service procedure.
  5. Inspect the retainer. If the connector is packed with dirt, corroded, or damaged, clean and diagnose before forcing the tool into place.

Safety notes

  • A/C systems can be under high pressure and may require certified recovery equipment before lines are opened.
  • Fuel systems can retain pressure after the engine is off; relieve pressure according to the service manual.
  • Work away from ignition sources, hot exhaust parts, and energized electrical equipment when fuel lines are involved.
  • Wear eye protection and gloves appropriate to the fluid or refrigerant being serviced.
  • Replace damaged O-rings, retainers, or connectors according to the service procedure; the disconnect tool only releases the fitting.

Good fit, bad fit

Good fit: a matching-size A/C spring-lock or fuel-line quick-connect fitting where a collar-style release tool can slide in squarely and compress the internal retainer.

Bad fit: an unidentified connector, a pressurized system without the required service steps, a damaged fitting, or a vehicle procedure that calls for a different disconnect tool.

Related Parts Universe links

Lisle 37000 is best treated as a fitting-release kit, not a shortcut around identification. Match the connector, size, and service procedure first; then use the correct included tool to release the coupling cleanly.

0 Comments
Lisle 12390 Oxygen Sensor Wrench: When Access Is the Problem

Oxygen sensor service often becomes difficult for a simple reason: the sensor is threaded into the exhaust, but its wire lead keeps a normal closed socket from sliding over the top. If access is tight near a manifold, pipe, catalytic converter, or heat shield, the tool choice matters before you start applying force.

Lisle 12390 Dual Drive Oxygen Sensor Wrench is a buyer-focused option when the job calls for a slotted 22 mm oxygen-sensor tool instead of a standard wrench or socket. The key is confirming the sensor hex, clearance, and service procedure first rather than assuming one tool fits every vehicle.

What Parts Universe lists

Parts Universe currently lists this item as Lisle 12390 Dual Drive Oxygen Sensor Wrench. The active Shopify product record verified for this article shows:

  • Parts Universe SKU: LSL-12390
  • Manufacturer part number: 12390
  • Current Parts Universe price: $23.99
  • Current inventory: 2 units
  • Current status: active and available for sale

What Lisle verifies

Lisle's official product page identifies this item as the 12390 Dual Drive Oxygen Sensor Wrench. Lisle describes it as a 22 mm socket tool made for loosening stubborn oxygen sensors, with both 1/2 inch and 3/8 inch drive options.

The manufacturer-listed features explain why the tool exists:

  • Use a 1/2 inch breaker bar on the end of the tool for initial loosening.
  • Use a 3/8 inch ratchet on top for faster removal and installation after the sensor breaks loose.
  • The slotted body gives clearance for oxygen-sensor wire harnesses.
  • The neck design fits oxygen sensor applications with a heat shield.
  • Lisle lists forged, heat-treated steel and a six-point design for high-torque removal applications.

When this wrench makes sense

Choose a tool like Lisle 12390 when the sensor has a 22 mm hex and the wire lead or surrounding heat shield makes a normal socket awkward. The dual-drive layout is useful when you need a breaker bar to start movement, then a ratchet to continue once the sensor is free enough to turn.

It is also a reasonable choice when the sensor is still being reused or inspected and you want to avoid cutting the wire lead just to use a deep socket. If the old sensor is being discarded and access allows it, a different removal method may be acceptable under the service procedure.

Checks before buying

  1. Confirm the sensor hex. Lisle identifies this as a 22 mm socket tool. Do not assume every sensor or aftermarket bung uses that size.
  2. Check access. Look at the exhaust pipe, manifold, catalytic converter, shields, floor pan, and nearby wiring to decide whether the side slot and dual drive will help.
  3. Read the service information. Some vehicles call for specific removal steps, anti-seize guidance, torque values, or sensor replacement precautions.
  4. Inspect the sensor and bung. Heavy corrosion, damaged hex flats, cross-threading, or exhaust leaks can turn a tool purchase into a repair-planning decision.
  5. Plan the drive tool. Use the 1/2 inch breaker-bar option for initial loosening only when the tool is seated squarely; switch to a 3/8 inch ratchet when the sensor is moving cleanly.

Safety notes

  • Let the exhaust cool before working near manifolds, pipes, catalysts, and shields.
  • Support the vehicle securely if access requires lifting it; never rely on a jack alone.
  • Keep the tool fully seated on the sensor hex before applying breaker-bar force.
  • Route the sensor lead through the slot without pulling or twisting the harness.
  • Follow the service manual for torque, thread treatment, and any battery or emissions-system precautions.

Good fit, bad fit

Good fit: a 22 mm oxygen sensor where the wire lead or heat shield makes a normal socket inconvenient, and there is enough room to seat the Lisle wrench squarely.

Bad fit: a sensor with a different hex size, badly rounded flats, no room for the wrench body, or a job where the service manual calls for a different tool or replacement procedure.

Related Parts Universe links

Lisle 12390 is best treated as an access tool, not a universal fitment promise. Verify the sensor size and working room first; then use the dual-drive design where a slotted 22 mm wrench solves the real problem on the job.

0 Comments
Lisle 14900 Terminal Tool: When GM Wiring Needs Pin Release

Electrical connector work often goes wrong before the actual repair starts. A tab gets bent, a terminal is pulled by the wire, or the wrong pick damages a connector cavity that was still reusable. A dedicated terminal-release tool is a small purchase, but it can be the difference between a clean repin and a damaged harness.

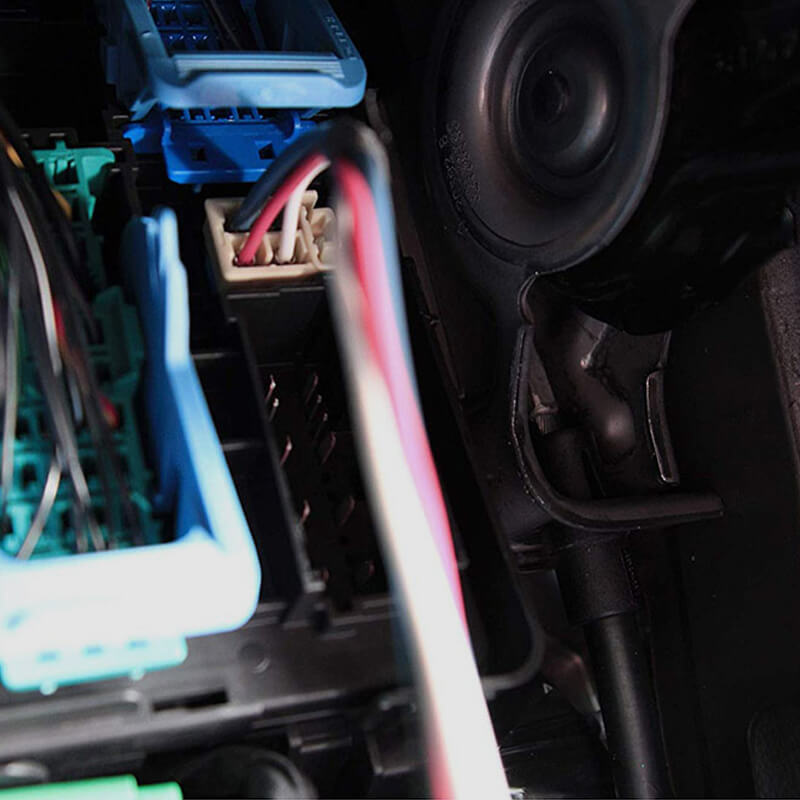
Lisle 14900 Terminal Tool for GM is a focused tool for buyers working around older GM connector service. Lisle's official product page identifies it as a tool for Pack-Con and Weather-Pack terminals on GM C3 systems, and also says it can retrieve trouble codes from GM vehicles with ALDL, or Assembly Line Diagnostic Link.

What Lisle 14900 is

Lisle lists this product as 14900 Terminal Tool for GM. The official Lisle page shows SKU 14900 and UPC 083045149002. Parts Universe lists it as Lisle 14900 Wire Terminal Tool and Trouble Code Tool with SKU LSL-14900.

  • Parts Universe product: Lisle 14900 Wire Terminal Tool and Trouble Code Tool
  • Parts Universe SKU: LSL-14900
  • Manufacturer part number: 14900
  • UPC: 083045149002
  • Current Parts Universe price: $15.99
  • Current Parts Universe status: active and available for sale

When this tool makes sense

Buy Lisle 14900 when the job is connector service, not wire cutting. Lisle says its wire terminal tools are designed to remove wires from terminals without damaging either, and specifically calls out Pack-Con and Weather-Pack terminals on GM C3 systems for part 14900.

  • You need to release terminals from a compatible GM connector without pulling on the wire.
  • You are replacing a shell, moving a circuit, or repairing a damaged terminal while trying to preserve the harness.
  • You are working on a project where identifying the connector family matters before buying a larger terminal-tool kit.
  • You want the ALDL trouble-code key function Lisle documents for some GM applications with Assembly Line Diagnostic Link.

Fitment: identify the connector first

This is not a universal promise for every connector on every vehicle. The documented scope is Pack-Con and Weather-Pack terminals on GM C3 systems, plus the ALDL trouble-code function referenced by Lisle. Before ordering, compare the connector style, service information, and terminal-retention design on the vehicle in front of you.

If the connector is a different terminal family, a smaller sealed connector, a modern sensor connector, or an aftermarket plug, a different release tool may be the better match. Forcing the wrong tool into a cavity can spread a terminal, break a lock tang, or create an intermittent electrical fault that is harder to diagnose later.

Why terminal tools beat picks and paper clips

A pick may work once, but it is easy to pry at the wrong angle. Terminal-release tools are shaped around the job: depress the locking tang, support the terminal path, and let the wire slide out once the retainer is released. That is especially valuable when the connector is old, heat-cycled, or no longer easy to replace.

For buyers, the question is not whether a small screwdriver can sometimes release a terminal. The better question is whether the connector, wire, and time are worth protecting. On an older GM harness, the answer is often yes.

Use it as part of a careful workflow

  1. Document the connector before disassembly with photos or a pinout note.
  2. Disconnect power as required by the service procedure before terminal work.
  3. Remove any secondary lock or connector position assurance piece before trying to release terminals.
  4. Use the terminal tool to release the retaining tang, then pull gently from the wire side only when the terminal is free.
  5. Inspect the terminal for spread, corrosion, looseness, or broken locking features before reinstalling it.

Safety and diagnostic notes

  • Do not probe or repin airbag, restraint, high-voltage, or unknown safety circuits without the correct service information.
  • Avoid shorting terminals when using any diagnostic key or jumper-style function.
  • If a warning light, no-start, or drivability issue is active, record codes and baseline symptoms before disturbing connectors.
  • Use eye protection when working around brittle plastic connector locks or corroded terminals.
  • Replace terminals, seals, or connector bodies that are damaged instead of forcing them back together.

Related Parts Universe links

Lisle 14900 is a smart buy when the job calls for controlled terminal release on the GM connector families Lisle documents. Match the tool to the connector, protect the wiring, and stop before forcing anything that does not release cleanly.

0 Comments
Lisle 54150 Puller: When to Use It on Battery Terminals and Wiper Arms

Some small service jobs become difficult when a part is stuck on a tapered post. Battery cable clamps can seize to a battery terminal, and bolted-on wiper arms can hold tightly to the wiper transmission spline. The Lisle 54150 Battery Term & Wiper Arm Puller is a compact puller for those two specific removal jobs.

What the Lisle 54150 is designed to remove

Lisle describes the 54150 as a dual-purpose puller for battery terminals and bolted-on windshield wiper arms. The tool uses jaws, a knurled cone, and a center screw so the user can lift the part straight off instead of prying from one side.

  • Battery cable clamps that are stuck on the battery post
  • Bolted-on wiper arms that fit over a tapered spline
  • Jobs where controlled upward pressure is preferable to prying

When it makes sense for a buyer

This is the kind of tool to consider before a battery replacement, battery cable service, wiper arm replacement, or cowl-area repair where the wiper arm needs to come off cleanly. It is especially useful when the part has corrosion, age, or weather exposure working against it.

It is not a universal answer for every wiper design. The wiper-arm use case is for bolted-on arms that fit over a tapered spline. If the vehicle uses a different arm design, confirm the service procedure before ordering or using a puller.

Safety checks before you start

  • Wear eye protection and gloves, especially around batteries and corrosion.
  • Keep sparks, flames, and metal jewelry away from the battery area.
  • Follow the vehicle service information for battery disconnect order and any electronic memory procedures.
  • Mark the parked position of a wiper arm before removal so it can be reinstalled in the same location.
  • Protect painted cowl trim and glass, and stop if the arm or terminal does not move with reasonable force.

How the tool works

For battery terminals, Lisle specifies tightening the knurled cone to force the jaws under the cable clamp, then turning the center screw to lift the clamp off the terminal. For a suitable bolted-on wiper arm, the puller screw pad is designed to sit on top of the spline post while the screw lifts the arm.

That straight lifting action is the main reason to use a puller. Side-loading a battery post or prying near a windshield can damage surrounding parts, so a controlled pull is the better approach when the tool fits the job.

Product details verified before publishing

  • Parts Universe product: Lisle 54150 Battery Term & Wiper Arm Puller
  • SKU: LSL-54150
  • Manufacturer part number: 54150
  • UPC listed by Lisle: 083045541509
  • Lisle-listed product weight: 0.63 lb

Shop the tool and related categories

View the Lisle 54150 puller at Parts Universe

Tool fit and service steps vary by vehicle. Always follow the vehicle service information and product instructions, and use professional service when a component is damaged, badly corroded, or unsafe to remove.

0 Comments


img

Added to cart successfully!